Enable/Disable Rapid Security Response Software Updates on Mac in macOS 13 Ventura
To get started, let’s briefly discuss how this new add-on works!
So, How Does Rapid Security Response Software Update Work?
Rapid Security Response Software Update is designed to update the security of your Mac without needing to update the entire system. Yeah, you read that right! You can choose to automatically upgrade the security of your macOS device without having to trigger the full-on software update. However, do note that it will still require your Mac to be rebooted to implement the changes. It’s also worth pointing out that the Rapid Security Response Software Update is enabled by default. Knowing how important this feature is, it’s good to keep it turned on. However, you have the freedom to enable or disable it at will.
Quick Way to Enable/Disable Rapid Security Response Software Updates on Mac
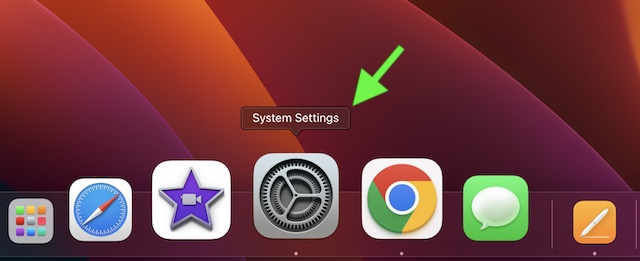
- First off, click on the Apple menu at the top left corner of the screen and choose System Settings in the menu. Or, press the Command+Spacebar -> enter the System Settings and launch it.
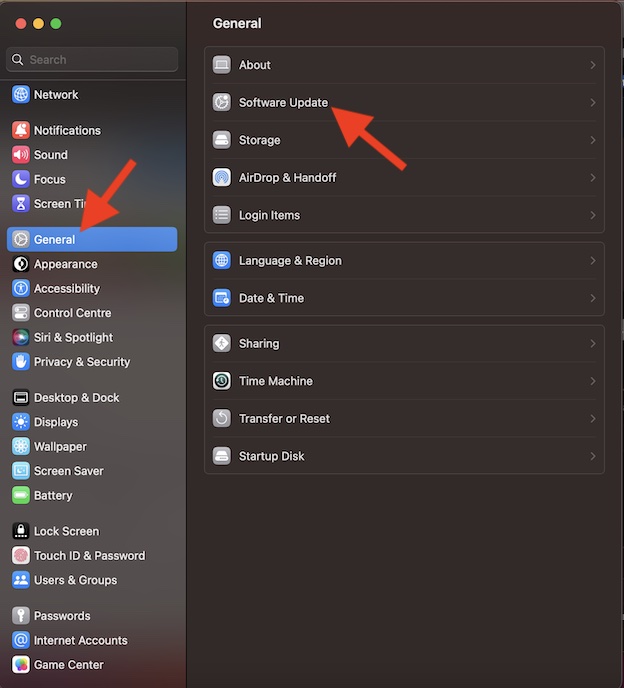
- In the System Settings menu, click on General.
- Now, click on Software Update.
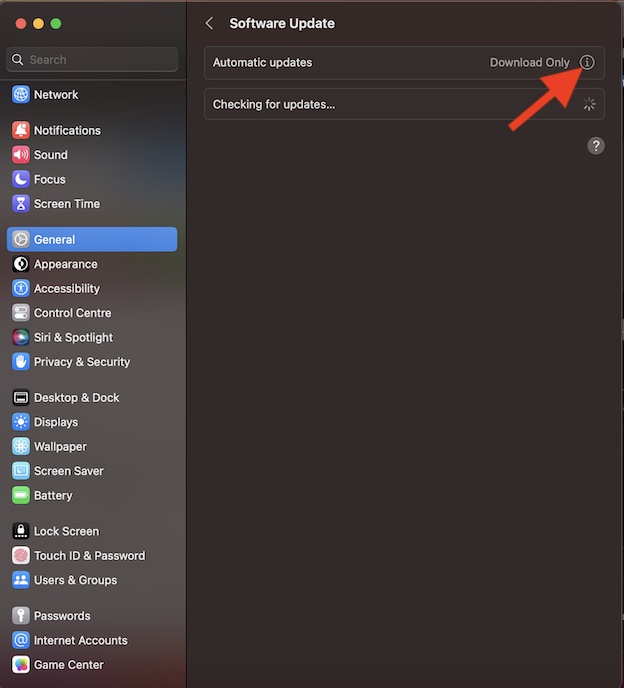
- Click on the info button next to Automatic Updates.
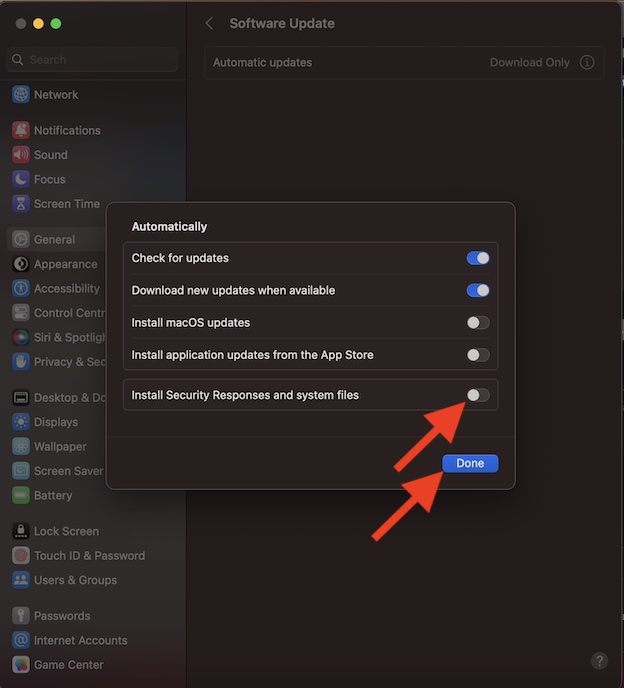
- After that, turn off the switch next to Install Security Responses and System Files.
- Be sure to click on Done to confirm that you want to disable it.
- Finally, you can use your Touch ID or administrator password to authenticate. That’s it! From now onwards, Apple will no longer install the rapid security response software updates automatically. Later, if you ever happen to change your mind, head into the Automatic Updates section and turn it back on.
My Thoughts…
While Apple has always been very sensitive to security and privacy, the Cupertino giant seems to have become more aggressive than ever before on this front. The company has introduced a series of notable security features including the Lockdown Mode, Safety Check, the ability to bypass CAPTCHAs automatically, App Transparency, and more. If you want to enhance the security of your personal information, do not forget to get the most out of these new add-ons as well. You may also like to catch up with:
How to Delete Siri History on iPhone, iPad, and Mac How to Show iPhone Battery Percentage on Lock Screen in iOS 16 How to Transfer an eSIM Between iPhones in iOS 16


