Most of the times users want to remove NVIDIA graphics drivers from Windows 11 because the current version is full of bugs or having compatibility issues with intel graphic drivers. Apart from that there could be other reasons for doing so.
How to Remove NVIDIA Drivers from Windows 11 | 10
No matter, what is your reason behind removing NVIDIA graphic cards from Windows 11 PC. The following blog post has possible ways on how to do that: You need to keep in mind that the steps discussed below works for both Windows 11 as well as Windows 10 to remove NVIDIA Graphic Drivers
Remove NVIDIA Drivers Using Control Panel
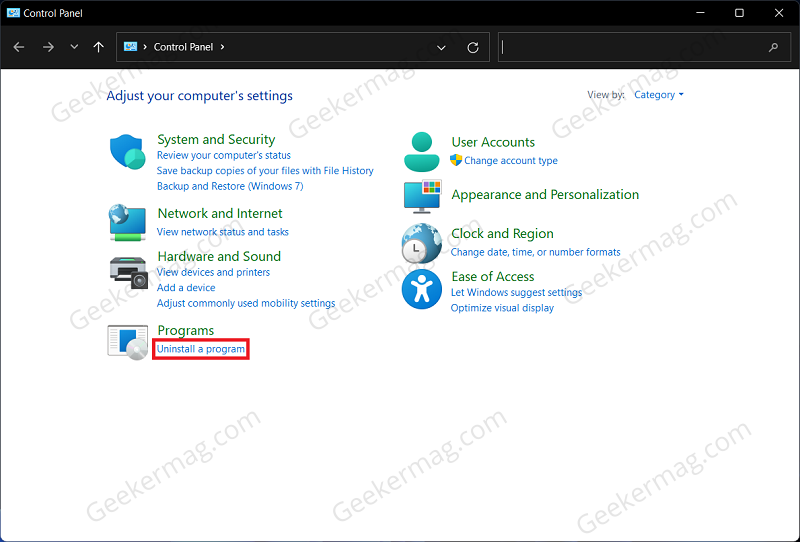
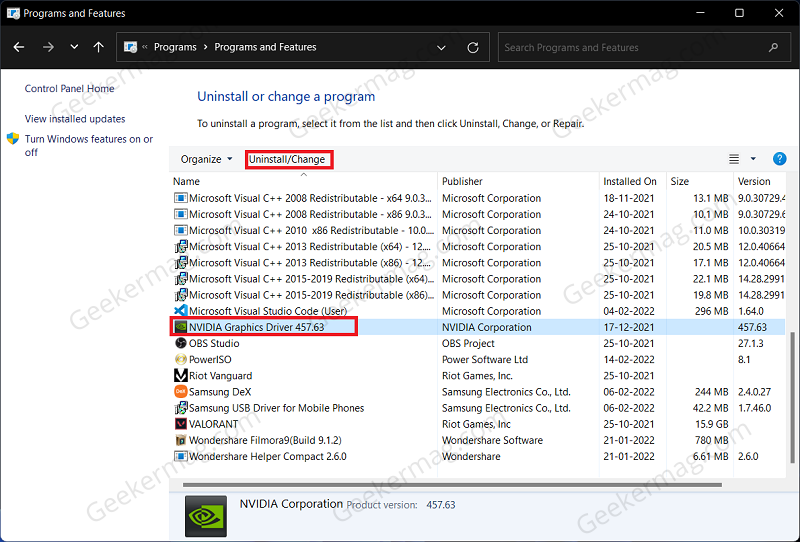
The very first way to remove NVIDIA drivers on your PC is using Control Panel. Here’s what you need to do: Press the Windows key to open the Start Menu. In the Start Menu, search for Control Panel and then click on the relevant search result to open the Control Panel on your PC. In the Control Panel, click on Uninstall a program option that you will find under the Programs section. From the list of programs that opens up, click on the NVIDIA Graphics Driver and then on Uninstall/Change button. When UAC dialog box appear, click Yes uninstall the NVIDIA Graphic Driver. If possible reboot your computer to complete the process.
Remove NVIDIA Drivers Using Device Manager
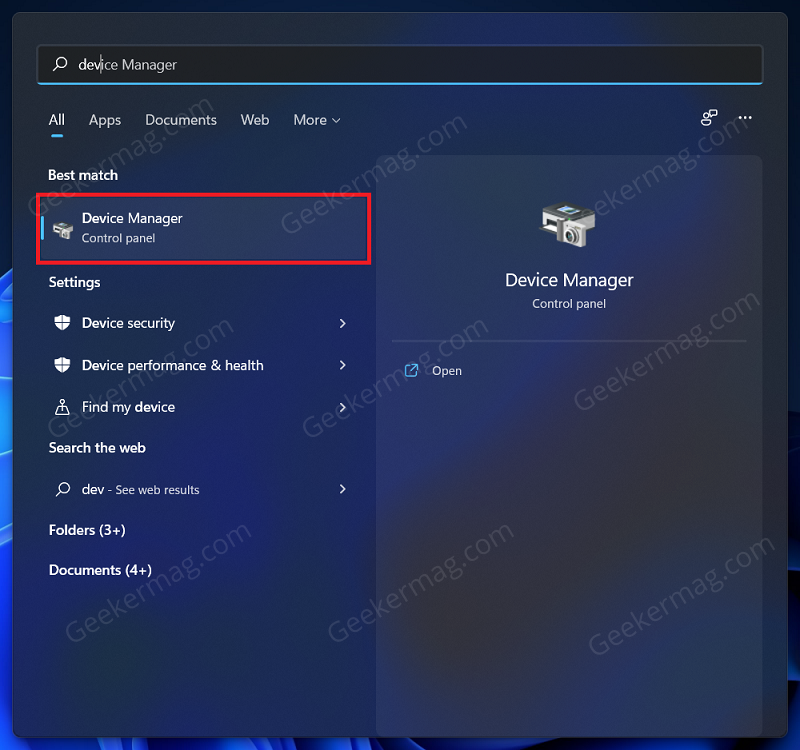
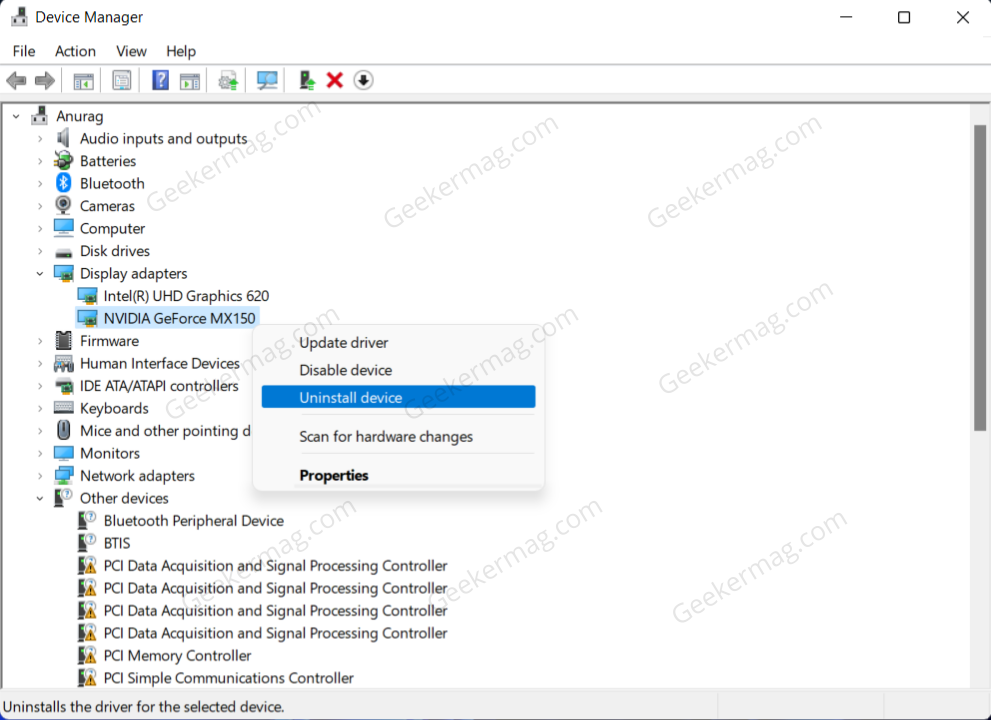
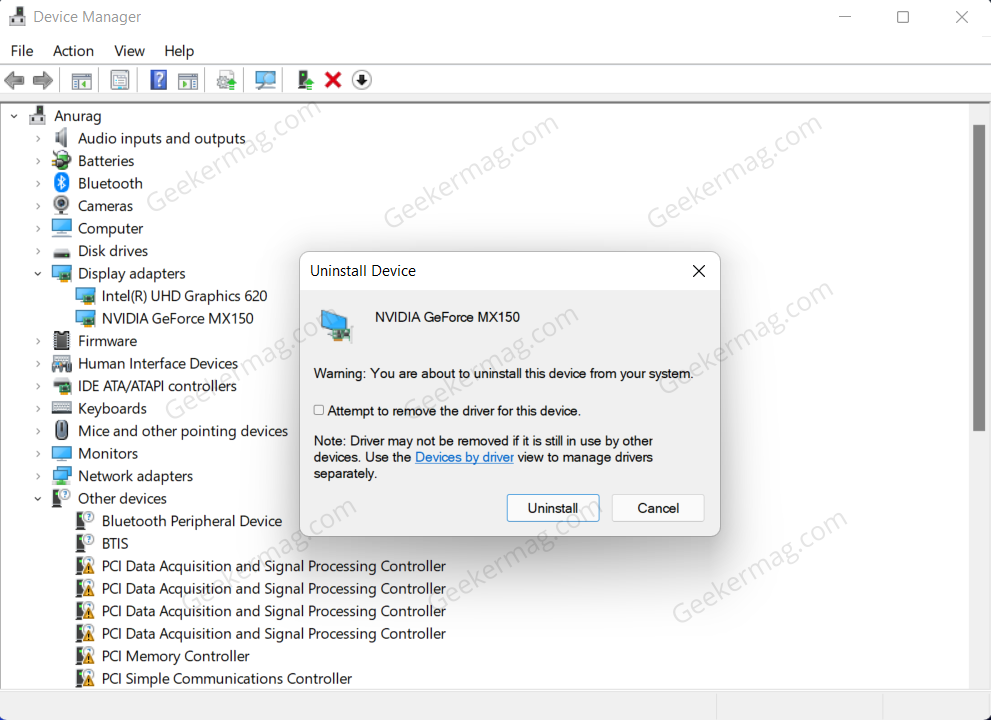
Another way using which you can remove NVIDIA Graphic drivers from Windows 11 as well as Windows 10 is by using the Device Manager. Here’s you can do that: Open the Start Menu by pressing the Windows key combo. Search for Device Manager in the Start Menu. Now from the search result, click on Device Manager to open it. In the Device Manager, expand the Display Adapters by double-clicking on them. Now select your NVIDIA drivers from the list. Right-click on it, and then click on Uninstall Device. When asked to confirm uninstalling their device, click on Uninstall and you will have successfully removed NVIDIA Drivers. At last, reboot your computer to apply the changes.
Remove NVIDIA Drivers Using File Manager
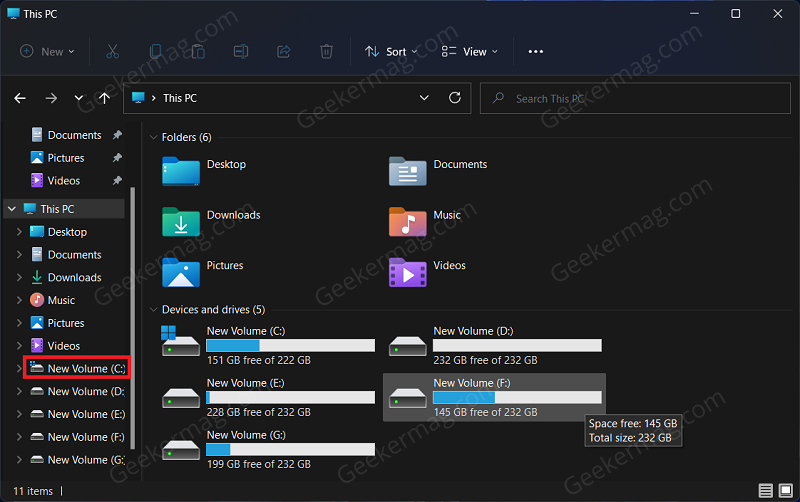
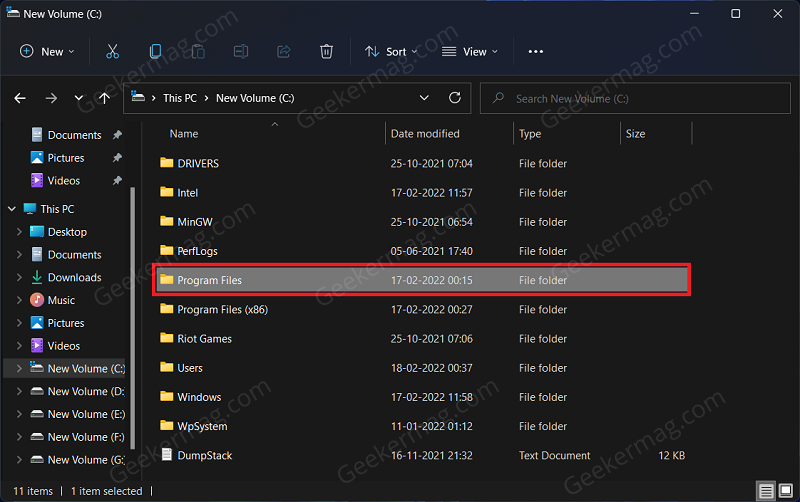
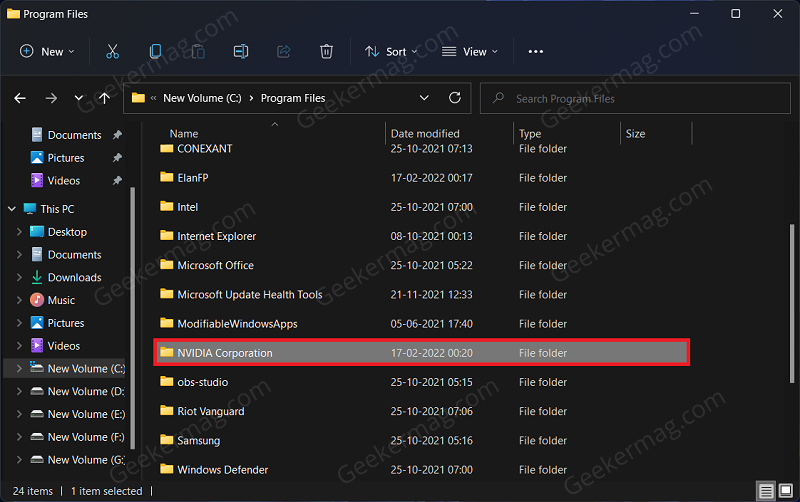
You can also delete NVIDIA folders available on your device to Remove NVIDIA Drivers from Windows 11 PC. Here’s what you need to do: First of all, you need to Show hidden files and folder in Windows 11 File Explorer. In case, you’re using Windows 10, then use this method. After that, you need to head over to C: drive. To do so, click on the C: drive on the left sidebar. In the C: drive, double-click on the Program Files folder to open it. Now, select the NVIDIA folder you see here and delete it by pressing the delete key on your keyboard. Do the same for the NVIDIA folders in Program Files (x86) and Program Data folders.
Delete NVIDIA Registry
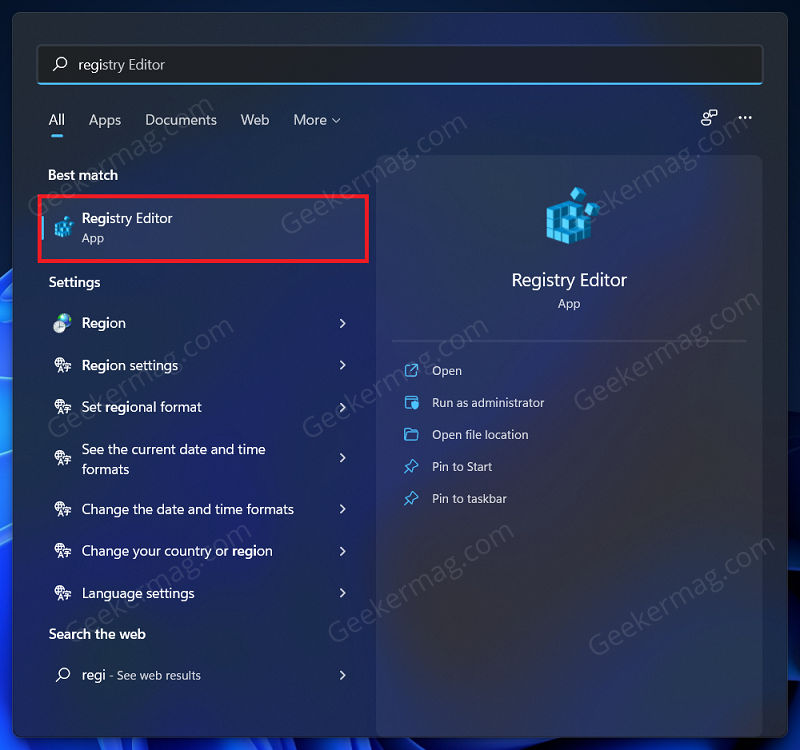
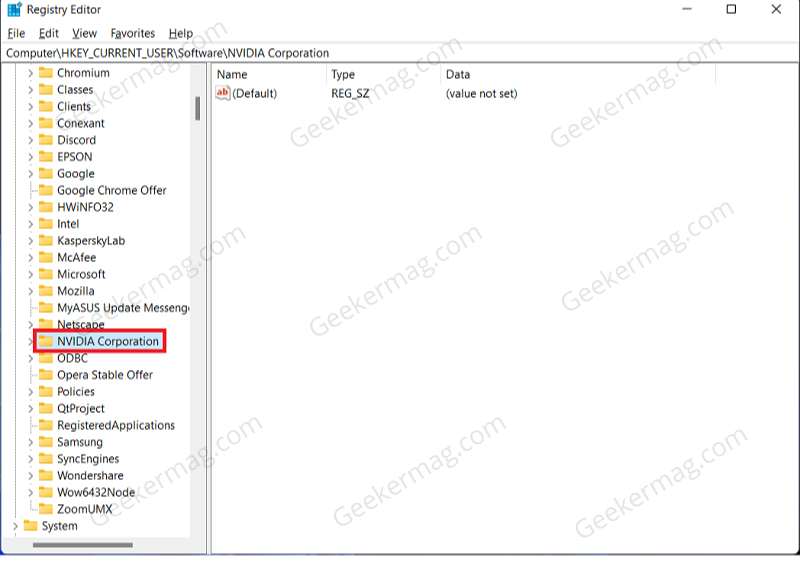
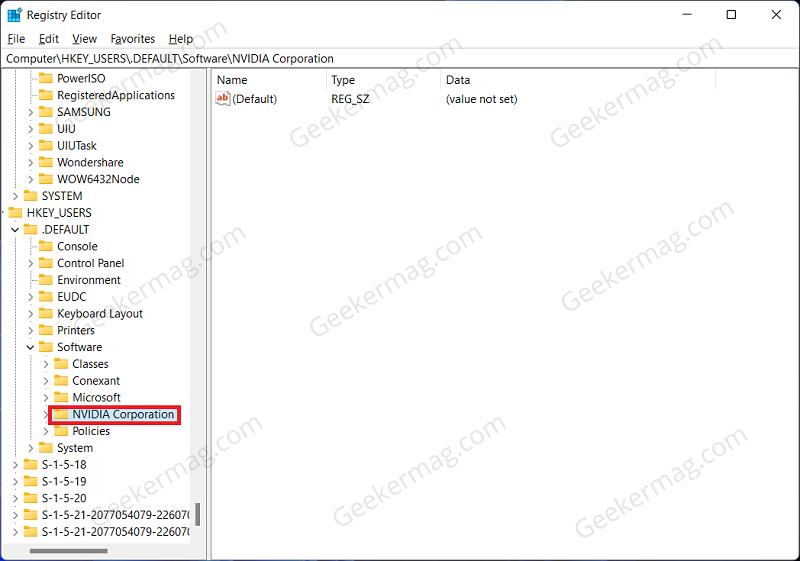
Another way to remove NVIDIA drivers from your PC is by deleting the NVIDIA Registry keys. To do so, follow the steps given below- Press the Windows key on your keyboard to open the Start Menu. In the Start Menu, search for Registry Editor and then click on the relevant search result to open the Registry Editor. Next, head to the following address in the Registry Editor: HKEY_CURRENT_USER\Software Now on the left sidebar, select the NVIDIA folder and delete it. After doing so, head to the following address in the Registry Editor: HKEY_USERS.DEFAULT\Software Select any NVIDIA folders you see on the left sidebar, and then delete it. After doing so, close the Registry Editor and the NVIDIA drivers will be removed from your PC.
Use Third-Party Driver Uninstall
Apart from these two options there are various third-party driver uninstall programs available for Windows 11 as well as Windows 10. You can search the web and find the suitable one for your device. If you’re already using any program already, then feel free to share with us in the comments.


