What Causes Ethernet Not Working In Windows 11?
In order to help you get familiar with the issue and to make prevention and fixing easier, we will discuss the typical causes of Ethernet not working in Windows 11 before getting into the tested solutions. The issue is majorly due to a corrupt or outdated Ethernet driver on your computer. Most Windows users don’t pay attention to updating software like this on their computers, and this is why they frequently come down with this kind of issue. Wrong Ethernet settings on your computer and malware issues are two more things that frequently cause the Ethernet not working issue. The issue could also be caused by a defect in your Ethernet source or cable. Considering all these possible causes, we have included the best ways to fix the issue and will cover them below.
Fix Ethernet Not Working In Windows 11
These are the best methods to use in fixing it if you start to experience Ethernet not working in Windows 11:
1. Restart Your Computer
Restarting your computer—as easy as it may sound—has consistently been one of the best ways to fix issues on Windows computers since it will give your PC a fresh start and consequently resolve the problem. Before trying other fixes, you should try this method to fix this Ethernet isn’t functioning issue.
2. Check Your Ethernet Cable
When you run into this issue, you should also make sure the Ethernet cable is in good working order. Sometimes an Ethernet connection won’t work on a computer because the Ethernet cable or the connector is damaged. Moreover, unlike in some other situations when the Ethernet is seen but not functioning, in this case, it won’t even be detected on your computer. You can even try another Ethernet cable out, and hopefully, the issue will be resolved.
3. Perform Power Reset for your Ethernet Source
At times, the Ethernet not working in Windows 11 error may result from a temporary glitch in your Ethernet source. Then, you can power reset the Ethernet sources and check if the issue is fixed. To power reset router and modem:
- Unplug the router’s power adapter from the wall outlet.
- Also, unplug the modem’s power adapter from the wall outlet.
- Leave these devices unplugged for a couple of minutes.
- Now plug back the router and modem power adapter.
- Wait for their power to be fully restored, connect it with your computer, and see if the issue has been fixed.
4. Check Network Status
You can check the network status to confirm the issue and determine what is wrong with the Ethernet on your PC.
- Press Windows + I to open Settings on your computer.
- Tap on Network & internet and check the Ethernet status at the top of the page. If the status shows connected, everything is okay with your computer Ethernet, but if you see “Action required,” click on the prompt to see the issue.
5. Enable Ethernet Adapter
The Ethernet adapter might not be activated because you tampered with the settings; in this case, Ethernet won’t work on your computer. Here is how to check if the Ethernet adapter is enabled or not:
- Press Windows + I to open Settings on your computer.
- Click on Network and internet.
- Scroll down on the page, and click Advanced network settings.
- Navigate to Ethernet under Network adapters and make sure it is enabled. If the Ethernet Adapter was enabled initially, you can also disable it and Enable it after some time.
6. Update Ethernet Driver
The Ethernet driver is the intermediary between your computer and the Ethernet source. An outdated Ethernet driver will result in issues with Ethernet on your computer. Thus, you should update the driver by following the steps below. You can use any of the methods below to update the Ethernet driver on your Windows PC
Through Windows Update Download the Updated driver from the Manufacturer’s website Use Driver Installer
If you have already downloaded the updated Ethernet driver version to your computer, this is what you should do to install it through Device Manager.
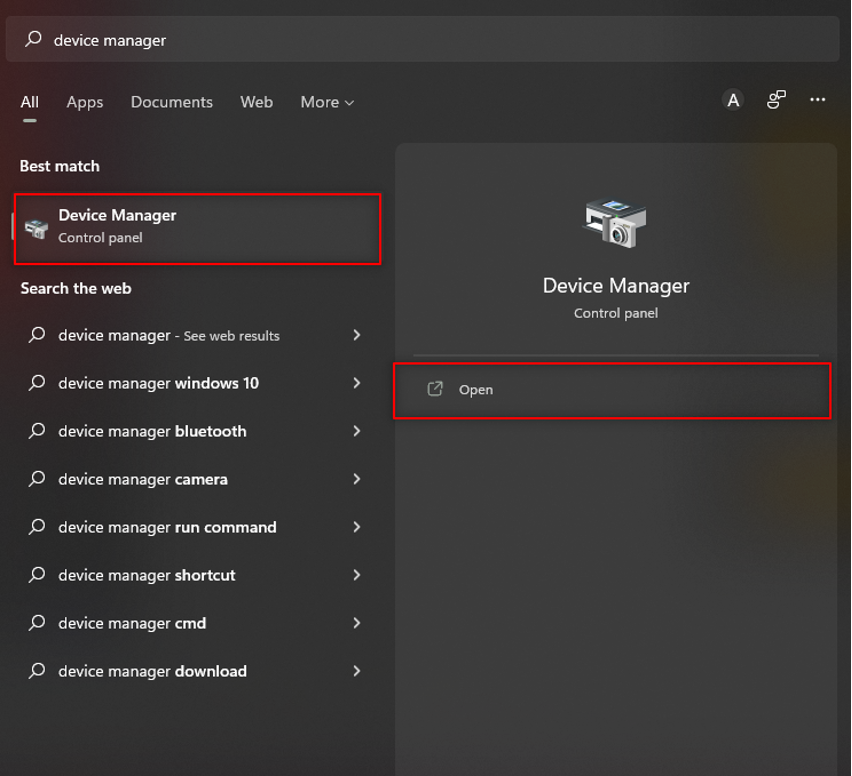
- Search for Device Manager in the Windows Search box and open it.
- Navigate to the Network adapter and double-click it.
- Right-click your Ethernet adapter and hit the Update driver option on the resulting drop-down menu.
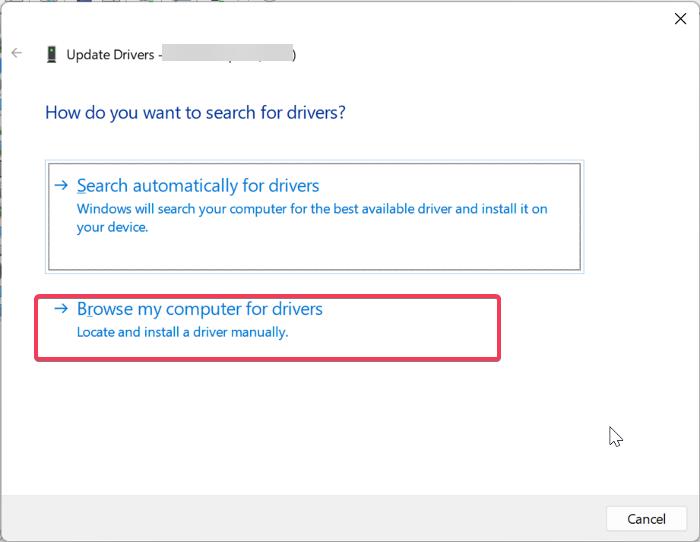
- Select Browse my computer for driver software and follow other prompts to select the downloaded driver on your computer.
7. Uninstall and Reinstall Ethernet Driver
As it was already discussed, this Ethernet not working issue is majorly caused by an issue with the driver. This driver issue often occurs during installation, in which case you will need to uninstall and reinstall the driver to resolve the problem. To uninstall and reinstall the Ethernet driver on a Windows computer, follow these steps:
- Right-click the Start menu and select Device Manager.
- Navigate to the Network adapter and double-click it.
- Right-click your Ethernet driver and select Uninstall device. After that, restart your computer, and the Ethernet driver will be automatically installed. You can then connect the Ethernet with your computer and see if the issue has been fixed.
8. Run Network Troubleshooter
A built-in utility called Windows Network Troubleshooter can help you in fixing any network-related problems with your PC. This troubleshooter assists in both finding and fixing issues. Using network troubleshooter on Windows 11 computer is as follows:
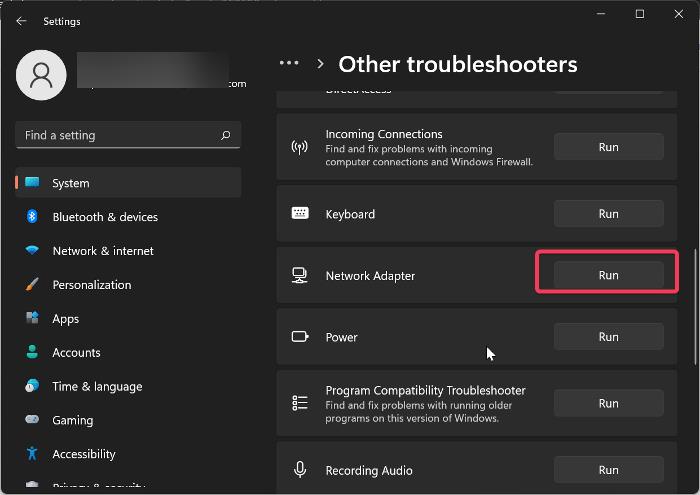
- Open Settings and select System.
- On the left panel, click on Troubleshoot.
- Click on Other troubleshooters and hit Run next to Network Adapter. This action will run the troubleshooter, which will tell you what’s wrong if it can identify the problem. However, not all network issues can be resolved by running a Windows troubleshooter. So if the issue wasn’t fixed, move to the next solution.
9. Run Network Commands
The Network command is another option to reset network devices and troubleshoot network issues on Windows computers.
- Open Windows Search, type cmd, and click Run as administrator.
- On the Command Prompt page, run the following commands one after the other: After running the commands, close Command Prompt and restart your computer.
10. Check Ethernet Adapter’s Power Management Settings
It is also possible that your computer is using the power management settings with the Ethernet adapter, and your computer is turning off the device when it is idle. Therefore, you should turn off this setting by following the steps below:
- Open Device Manager on your computer.
- Navigate to the Network adapter and double-click it.
- Right-click your Ethernet driver and select Properties.
- On the resulting dialogue box, tap on the Power Management tab.
- Uncheck the Allow the computer to turn off this device to save power option and click OK to save the changes. You can now restart your computer afterward for the changes to take effect.
11. Reset Network Settings
Resetting the network is another option for resolving this problem. This will assist in restoring the default settings if you’ve already made accidental changes to your network settings. Here’s how you can do it:
- Press Windows + I to open Settings on your computer.
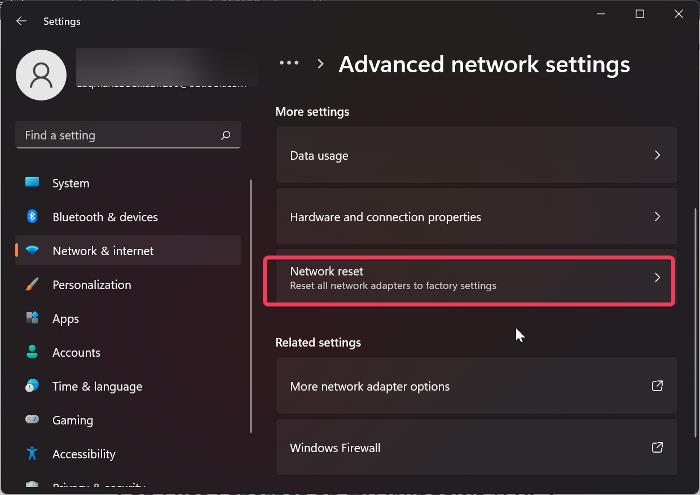
- Click on Network & Internet and select Advanced network settings.
- Click on Network reset.
- Then hit Reset now and tap Yes to confirm.
Can I use Ethernet on my Windows 11 PC?
Windows computers can connect to the internet using Ethernet other than WiFi. You can always use Ethernet, which even offers a faster network speed and better security than WiFi, as long as the computer has an Ethernet port and its driver loaded.
Final Words
The Ethernet not working in Windows 11 is a problem many experiences, although the root cause may vary. However, the solutions we have covered in this post address various situations in which this problem could arise. As a result, one of the fixes should enable you to fully fix this problem.


