How to Enable/Disable Stage Manager with Keyboard Shortcut on Mac
So, How do you create a custom shortcut for Stage Manager? Well, macOS 13 Ventura offers a dedicated setting where you can make a custom keyboard shortcut for Stage Manager. Hence, you can create and customize the shortcut with ease. Though this setting is a bit buried, it does not take long to bring it into play.
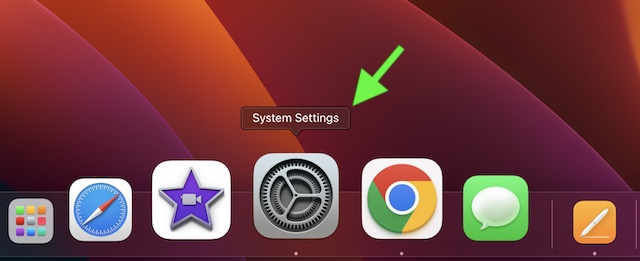
- To begin with, launch the System Settings app on your Mac. Another easy way is to click on the Apple menu icon at the upper left corner of this screen and choose System Settings.
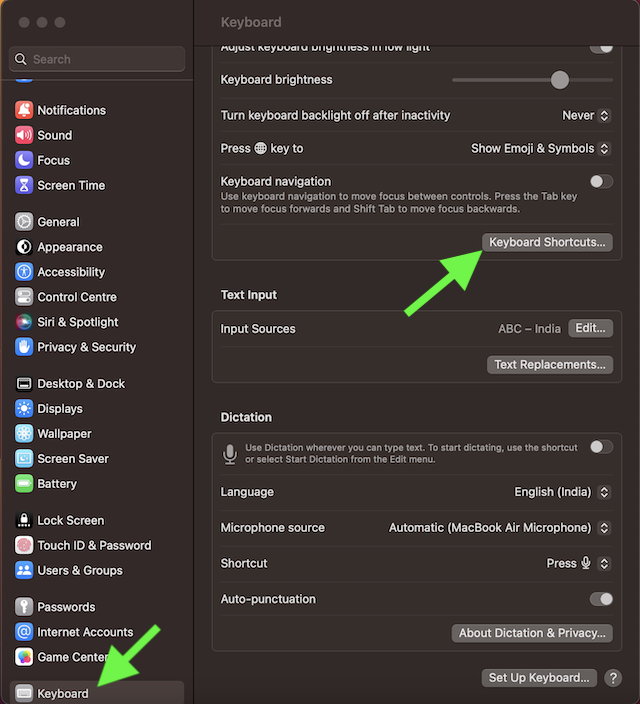
- Now, scroll all the way to the bottom of the Settings menu and choose Keyboard.
- Next, you need to select Keyboard Shortcuts.
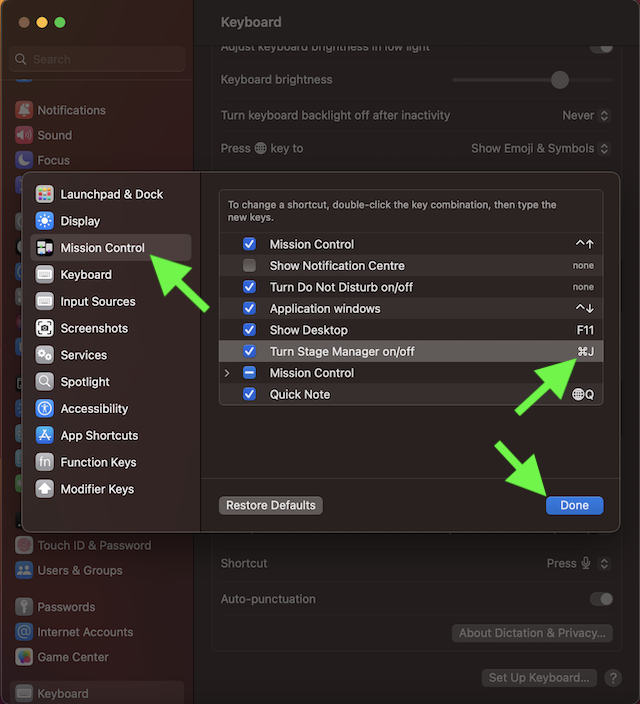
- Choose Mission Control in the sidebar.
- Double-click on None which appears on the right side of the Turn ON/OFF Stage Manager.
- After that, press the keys that you would like to use. For the purpose of this guide, I’m going to use the CMD-J shortcut.
- In the end, do not forget to click on Done to finish. And that’s pretty much it! From now onwards, you can use this very keyboard shortcut to turn on or off Stage Manager on your Mac. Later, if you ever wish to edit the custom keyboard shortcut, navigate to the keyboard setting > Turn ON/OFF Stage Manager and then edit or remove the shortcut as per your needs.
Signing Off…
So, that’s hot you can make a custom keyboard shortcut for Stage Manager on your macOS device. Now that you know how it works, make the most of it to take control of the windows organizer. Recently, we have covered several equally interesting guides related to macOS 13 including the quick ways to convert images, remove background from images, and block apps outside of the App Store. If you couldn’t catch up with these guides, make sure to check them out. To ensure you don’t miss out on any handy macOS tutorials, be sure to stay tuned in with us.


